Wondering how to improve the quality of a photo on iPhone so that you can share beautiful pictures with your loved ones or on social networks? You don't have to be a great photographer these days to share wonderful shots. Indeed, the possibilities of editing photos are so vast that you can improve the resolution, increase or decrease the brightness, modify the tones, add filters, erase imperfections, adjust the contrast ... So many settings that will allow you to get stunning photo quality. Thus, you will find in this article many tips to improve the quality of a photo on an iPhone. Good reading!

HDR mode will allow you to improve the quality of a photo on an iPhone
Le HDR mode (wide dynamic range) will allow you to take beautiful photos without having to edit them, against a background of high contrast. Your iPhone device will then take a multitude of photos in a row with different exposures in order to merge them in order to accentuate the highlights as well as the shadows of your photos. Indeed, this mode will allow your iPhone's camera to select a optimal light exposure so that the photo is the sharper as possible. But be careful, you have to use high definition when you are sure to be able to take a picture in optimal conditions: no movement, not too many shadows, on a stable surface ...
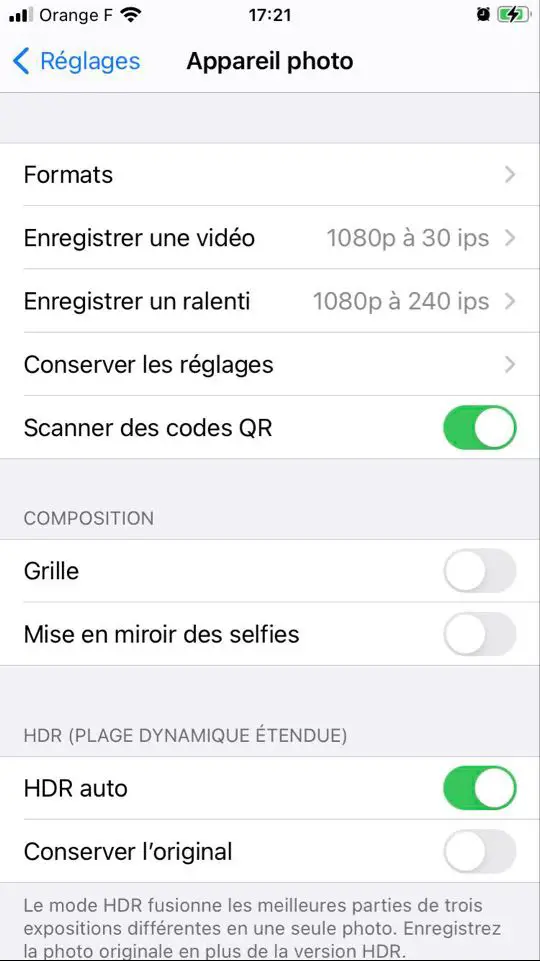
Here are the steps to follow in order toactivate HDR mode on your iPhone:
- Appointment in Part Settings from your iPhone
- Press Camera
- Swipe the slider to the right to activate the mode HDR Auto
Improve the quality of your photos automatically with the iPhone Magic Wand
The magic wand of iOS indeed allows you toimprove the quality of your images automatically, without you having to make any adjustments! Everything is calculated according to the criteria and the exposure of the photo. Once the photo is taken, all you have to do is press Edit, then on the magic wand in question, then to validate by clicking on OK:

You can also increase or decrease the exposure, choose the optimal brightness, attenuate or accentuate the highlights, modify the shadows, adjust the contrast of the photo, adjust the brightness, define the saturation, the vibrancy of the photo as well as the temperature. , modify the tint according to the desired effect, adjust the sharpness, increase the definition of the image, reduce noise and many other adjustments.
Use the right filters to beautify your photos
Filters can sometimes greatly improve the quality of a photo that is too dull or too cold, for example. They make it possible to restore life and intensity to your shots, while providing a warm atmosphere. Whether it is the filters offered by iOS or the many filters that the famous social network Instagram makes it available to you, do not hesitate to use it! Here are the steps to follow in order to add filters to your photos directly from your iPhone:
- Open the application Photos on your iPhone
- Choose the photo you want to edit
- Press Edit
- Press Filters (materialized by three small circles one inside the other in the toolbar)
- Choose the filter that suits you best
